I quit watching television and I am now a DIY-er. You can learn about why I cancelled TV here. Switching off the mind control machine to pick up new hobbies over the past two months has been glorious! I’ve read books and lined up DIY projects for warmer weather. My yard is a bit rough-and-tumble due to my Karelian Bear Dog, Kintla, who dug massive holes and shredded my tarp into pieces. So I have plenty of yardwork to finish once spring and summer roll around.
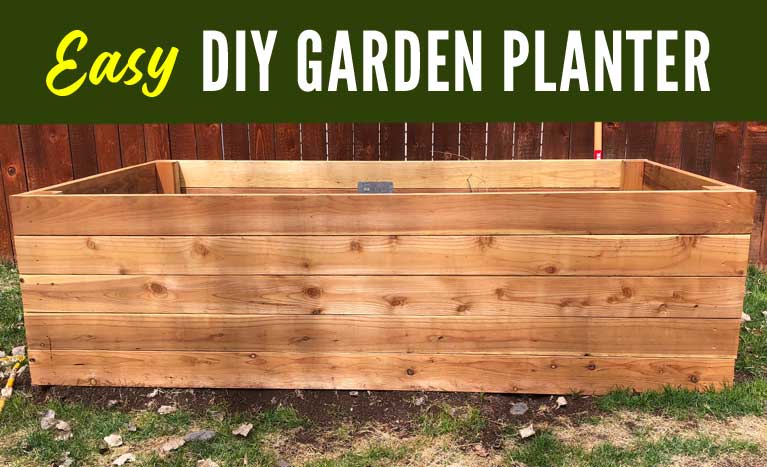
My latest DIY project was a raised garden bed. My interest in gardening rekindled recently, and I’ve been devouring gardening How-Tos and scouring gardening books for inspiration. I did have a very small raised garden planter in my backyard, only about 12 inches high, but Kintla played in it so it was a mess. I decided a tall garden planter was the way to go for my backyard and gardening needs. Eventually, I plan to be self-sufficient and grow 90-100% of my food, but that’s a ways off. I’m starting with baby steps—a raised 4 foot by 8 foot garden planter. This planter sits 27 1/2 inches high, so Kintla can’t ravage it. I don’t want my vegetable garden shredded like the rest of my yard. In my raised garden bed, I will cultivate tomatoes, carrots, and watermelon. Conjuring up the proper soil for my planter is also on my to-do list.
Building this raised bed planter was straightforward. I made a quick design (available below), picked out my supplies at Home Depot, brought them home and began construction.
At Home Depot, I checked every single board manually to ensure they were as straight as possible. I checked each piece. The redwood lumber pile was small, but I found the best boards by using the following method: put one end on the ground, bring the other up to eye level, and look down the entire length to see if it was bowed. You want straight boards that don’t warp to the side. There were some bad ones in the pile! I ended up with a few warped boards, but I will tell you how I straightened them below.
To make this simple raised bed garden planter, you need only two types of redwood board – 2”X6”X8’ and 4”X4”X10’ – and some screws to attach everything together.
Procedure
First make all your 2X6 boards about the same length. Don’t spend too much time on this because it doesn’t have to be precise. Pick a straight one and cut a small slice (about 1/8”) from both ends. Then lay it down and put each of the other boards on top of it, one at a time, drawing a line with a pencil where you will cut off the end to make them the same length. Then cut all boards at the pencil marks.
Since the planter is 5 boards high, lay 5 2”X6” boards side by side and measure how tall it will be. Mine was about 27 1/2”. Cut 4 posts with that length using the 2 8-foot posts. So you will have 4 posts that are 27 1/2” each.
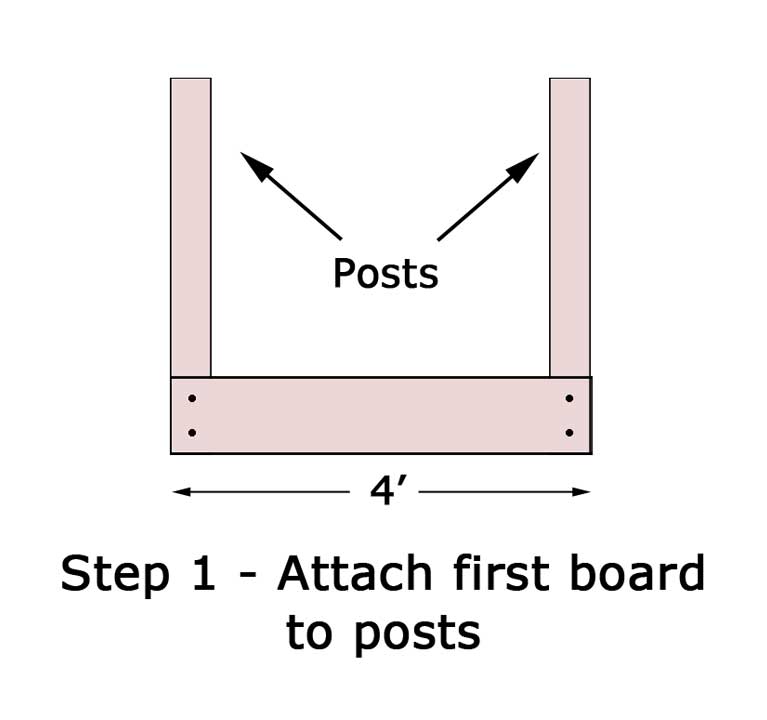
Next pick the 5 straightest 2”X6” boards and cut theme in half so you have 10 2”X6”X4’ boards for the ends. We will construct the ends first. Step 1 is to lay down 2 posts and screw the first 2”X6”X4’ board to the posts:
Then attach the other four 2”X6”X4’ boards to these posts:
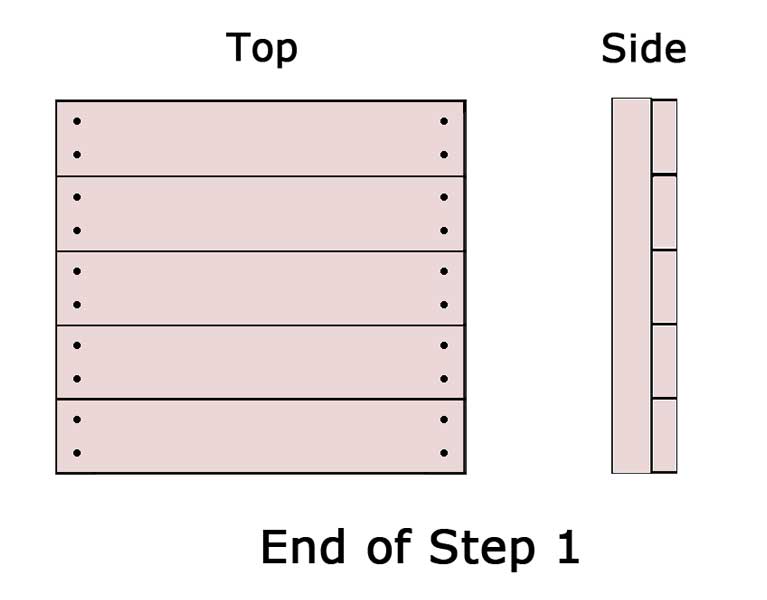
This creates 1 end of the planter. Do the same to create the other end of the planter so you have both ends. Then lay them on their sides and screw a 2”X6”X8’ board to the ends:
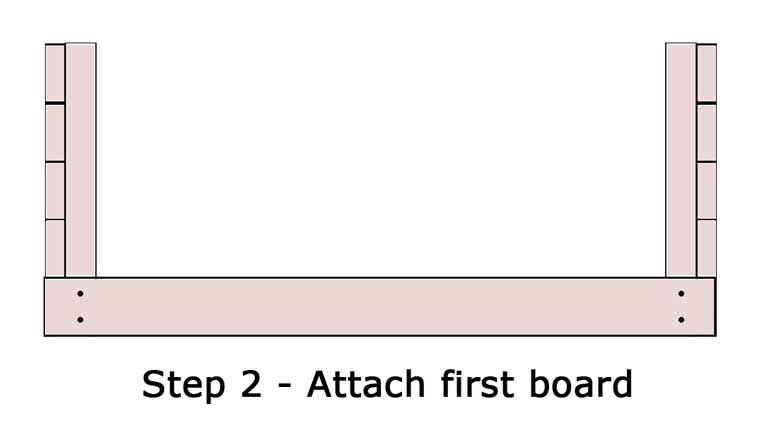
Then attach the rest of the boards, side by side, so you now have 3 sides of the planter complete. Note on crooked boards: If you run into a crooked board, just attach one end first and bend the other end so it is snug against the previous board. Since you have 8-foot lengths, they should bend into place without too much effort.
At this point, you will need someone to help you move the planter into its final resting location. Once there, attach the final side, one a 2”X6”X8’ board at a time until you are done:
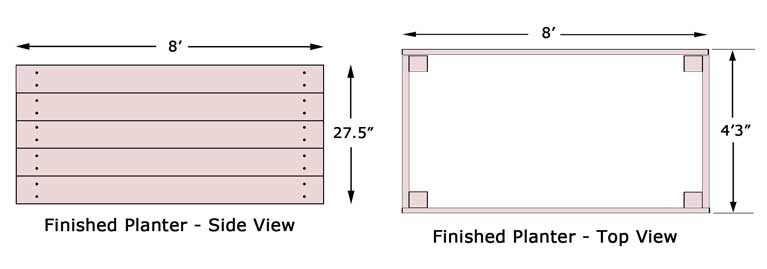
Because I have a frisky pup that loves to get into everything, I made my planter 5 boards high for a total cost of $323.25, but you could decrease the number of boards, and your cost will decrease proportionally.
Materials List
(15) – 2”X6”X8’ Redwood boards (current price: $15.98)
(2) – 3 3/8”X3 3/8”X8’ Redwood post (current price: $23.57)
(1) – 5 pound box of deck screws (current price: $26.41)
Total Cost for Materials: $313.25
Tools
10 Inch Miter saw – Current Price $99.00
Impact Driver – Current Price $94.97
Screwdriver Bit Set – Current Price $14.99

