Do you want to learn how to make the best homemade bread? This recipe is for you! This easy homemade bread recipe results in the lightest bread loaf you have ever made. I absolutely love making bread from scratch for a few reasons: you know what’s going into the bread unlike store bought mystery gunk, warm bread aroma fills up the house making your home smell delicious, and homemade bread is so easy to make!
Differences between store bought and homemade bread
The biggest difference between store bought bread and homemade bread is the quality. You can get a variety of breads at the store ranging in price, and I feel that any of these prepackaged breads, even the expensive ones, lack quality. These are big businesses, so they need to make money. Because of this, I feel that the ingredients lack and you will find that when you read the ingredient label. The only time I would ever buy bread and not make it in my own kitchen is if I’m getting it straight from a bakery that bakes bread fresh daily.
The ingredient labels are the scariest thing in store bought bread, and they have to be because this bread sits on the shelf for long periods of time. Because of this, it needs to be packed full of preservatives and other weird chemicals. I don’t exactly want to be eating things that I can’t even pronounce of have been bioengineered when I can make fresh bread with quality ingredients for cheap in my own kitchen.
Do you?
The best part about learning to make bread from scratch is that the skill and art of making bread is priceless. You can provide for your family and pass this skill down to your kids or other family members.
What ingredients do you need for homemade bread?
Fresh homemade bread from scratch requires basic pantry ingredients: water, sugar, yeast, butter, salt, and flour. I love how easy it is to make homemade bread with ingredients you already have in your kitchen. You can se me the difference in these ingredients versus store bought — you can pronounce all of the names and no preservatives are required. All of these items should be in your pantry, and if you’re like me, should be stocked up on! Will you be able to make bread for your family and yourself if you can’t get ingredients from the store anymore? I sure hope so!
How to make homemade bread step by step
Step 1) The first step in making bread from scratch is to gather your ingredients: 2 cups warm water (110F/45C,) 2/3 cup sugar, 1 1/2 tablespoons active dry yeast, 1/4 cup (1/2 stick) butter, melted, 1 1/2 teaspoons salt, and 6 cups all-purpose or bread flour.

Step 2) In a mixing bowl, add in the sugar to the warm water and mix. Next, add the yeast to the warm water and lightly mix together. Allow the yeast to bloom for 5-10 minutes. The yeast will become foamy.


Step 3) Mix in the melted butter and salt into the yeast mixture then begin adding in the flour one cup at a time. Knead the dough together until it is smooth and elastic. Place dough in a greased bowl and cover bowl with a damp cloth. Allow to rise until doubled, about 1 hour.
Step 4) grease two 9x5 loaf pans. Punch the risen dough down and knead for a few minutes. Divide in half, shape into loafs and place in the two loaf pans. Allow to rise until the dough has passed the tops of the loaf pans by about 1 inch. This takes about 30 minutes.
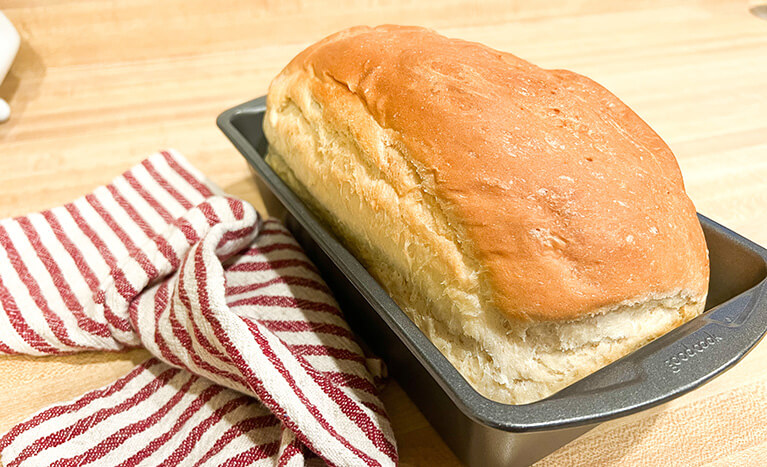
Step 5) Preheat oven to 350F and bake loaves for 25-30 minutes or until golden brown. Allow the loaves to cool completely before enjoying.
How long does it take to make homemade bread?
The preparation is about 10 minutes with mixing the ingredients and kneading. The rising takes about 1-2 hours. And the baking is about 30 minutes. Hands on is only about 10 minutes. Save yourself a trip to the store and make homemade bread— saving your time and money.
How do you store bread?
The only downside of homemade bread is that it doesn’t last as long as store bought because it doesn’t have preservatives. I think that is okay because you’re eating the food how it was meant to be eaten.
One benefit of this easy bread recipe is that it makes two loaves.
Once the bread has completely cooled, you can freeze one loaf and then use it whenever you need it or are finished with the other loaf.
You can store your bread on a counter in a bread bag or a ziploc bag.
How long is homemade bread good for?
A loaf is best eaten within 3 days, but it can last for up to a week. The freshness will deteriorate over time, so it is best to eat it in a short time period. Remember, there are no chemicals in the bread making it last for an abnormal amount of time.
Let’s get baking!
Homemade Bread
Ingredients
- 2 cups warm water (110F/45C)
- 2/3 cup sugar
- 1 1/2 tbsp active dry yeast
- 1/4 cup butter (1/2 stick), melted
- 1 tsp salt
- 6 cups all-purpose or bread flour
Instructions
- In a standing mixer bowl, mix the sugar into the warm water. Add in the yeast and lightly stir together. Allow to sit for 5-10 minutes until the yeast has “bloomed.” It will look foamy.
- Mix in the melted butter and salt to the yeast mixture. Begin adding the flour one cup at a time and knead together on low speed or by hand until the dough comes together and is smooth and elastic. Roll into a ball and allow to rise for 1 hour or until doubled.
- Once the dough doubles, grease two 9x5 loaf pans. Punch the dough down and knead for a few minutes. Divide in half and shape each half like a bread loaf and placed in the greased pans. Allow to rise for 30 minutes or until the dough is pass the top of the loaf pans by 1 inch.
- Preheat the oven to 350F (175C) and bake the bread for 30 minutes or until golden brown. Remove the loaves from the pans and allow to completely cool on a cooling rack before slicing.
- Enjoy!