Do you know there are two methods to can food?
Water bath canning and pressure canning. Water bath canning is common for jams and high acid foods. Pressure canning is used for low acid foods like most vegetables. If you are new to canning, start with water bath canning to get familiar with canning basics.
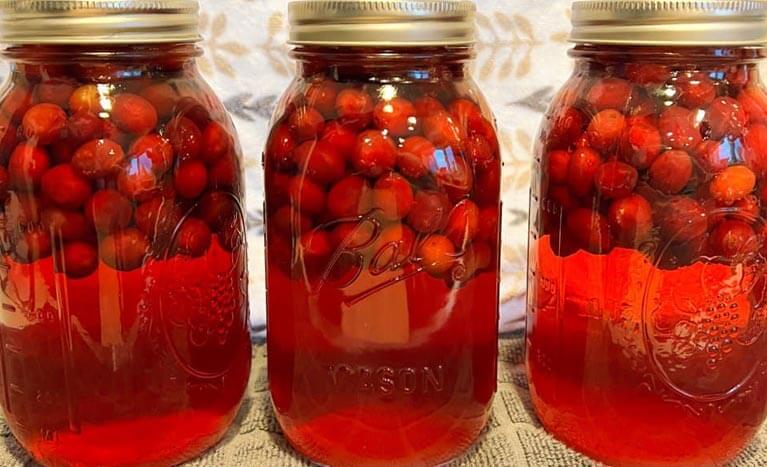
Today I'm using my large water bath canner to can some cranberry juice!
What is water bath canning?
Water bath canning uses boiling water to produce an environment within the glass jars that prohibits the existence of bacteria. It's a great way to preserve your harvest using jams and pickles! Only high acid foods can be safely canned with a water bath.

What do I need to water bath can?
A stock pot that is tall enough to cover a jar with at least one inch of water. You also need glass jars, lids, a canning supply kit, and whatever food items you wish to can. Then you are ready to go! Only use approved and tested recipes, so you know you are safely canning.
After the holidays, I purchased some cranberries. They often go on sale this time of year, so I thought, Why the heck not? I like drinking cranberry juice throughout the year for the health benefits it provides. Normally, store-bought cranberry juice is loaded with sugar; the labels reveal ginormous amounts of added sugar—so let's limit that! Plus, who knows how fresh those dusty bottles are after sitting forever and a day on the grocery store shelf. I prefer making my own juice so I know exactly what's in it and how fresh it is.
What are the health benefits of cranberry juice?
Cranberry juice is loaded with vitamin C. Vitamin C boosts the immune system, heals injuries, and promotes the production of collagen. Vitamin E and other vitamins and minerals are also found in cranberry juice. Antioxidants permeate the skin of the cranberry, so those antioxidants seep into the juice during the canning process.
How do I can cranberry juice?
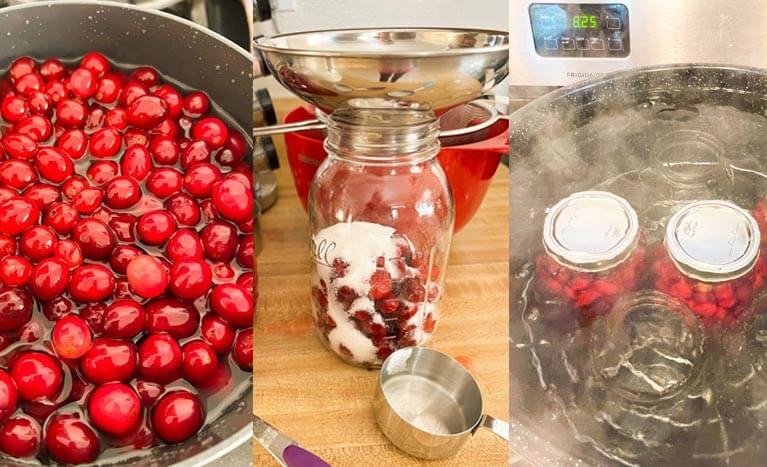
Easy! Use fresh or frozen cranberries. Heat the quart jars in a water bath canner. In a separate pot, heat water to pour over the cranberries. Using a funnel, fill the jars with 1 1/2 cups of cranberries and 1/3 cup granulated sugar—the sugar helps pull the juice from the cranberries. Fill the jars with hot water from the pot and leave a 1-inch headspace. Poke the cranberries down to get out any air bubbles. Wipe the rims of the jars with a towel dipped in white vinegar to remove any sugar or residue. Place the lids on the jars and screw the tops on hand tight. Process in a water bath canner for 25 minutes. Remove the jars from the bath and allow them to cool. Don’t touch them for 24 hours and make sure they have sealed. Let them sit for 6 weeks before consuming. Sift out the cranberries, and enjoy!

Cranberry Juice
Ingredients
- 1.5 pounds Cranberries 1.5 pounds yields 3 quart jars
- 1/3 cup Granulated Sugar per jar
Instructions
- Heat jars in a water bath canner and heat water in a separate pot. The water in the pot is used to cover the cranberries and sugar in the jars.
- Using a funnel, pour 1 1/2 cups of cranberries into each quart jar and top it with 1/3 cup of sugar. Add enough warm water from the pot to leave a 1-inch head space. Poke down the cranberries to remove any air bubbles.
- Wipe each jar rim with a towel dipped in white vinegar to remove any residue that could disrupt the seal.
- Place the lids on and screw the tops on hand-tight and place in the water bath canner.
- Bring the water to a boil, if it isn’t boiling already, and let jars bathe for 25 minutes.
- Remove jars from the canner and let them sit for 24 hours, undisturbed. Check the seals by pressing the middle tab and holding two edges of the lid to see if the lid comes off. Make sure your other hand is below the jar, ready to catch it, when you do this. If sealed properly, allow to sit for at least 6 weeks; then enjoy!
