In my recent journey to grow healthy food in my garden, I’ve stumbled into the most amazing wonder chemical. It’s called sulforaphane and I’m excited to tell you about it and show you exactly how to make it. That’s important because sulforaphane is extremely difficult to stabilize and package in a supplement. A few products have emerged in the market, but they are unregulated, so it’s best to grow it yourself.
I won’t cite any of the many scientific journals touting the countless benefits of sulforaphane, but from my brief research, I noticed there are many recent scientific studies about this magical drug. A quick search on Google Scholar for “sulforaphane” returns 41,000 hits (books and journal articles) with over 14,600 since 2017.
When I started researching sulforaphane and saw all the health benefits, my first thought was NO WAY! This can’t be true. It has to be a marketing gimmick. But if so many scientists are studying it, and so recently, there must be something to it. Since sulforaphane is something you grow yourself, this DIY health tip can’t be clickbait or fake hype or beefed up marketing tricks to get your money. Most of all, it comes from broccoli so we know it’s healthy.
What is sulforaphane and where does it come from?
Much of it resides in green vegetables like broccoli, which delivers abundant sulforaphane. But instead of growing broccoli and bloating out by eating gallons of broccoli, there’s a far better way to consume sulforaphane. I’m going to reveal a secret method to generate highly concentrated sulforaphane, and right in the privacy of your kitchen!
According to the US government, sulforaphane is considered to be a chemo-preventive agent against cancer, neurodegenerative diseases, cardiovascular disease and diabetes. The benefits go far beyond that. Instead of getting into all that scientific stuff, I will limit myself to informing you on the DIY method to PRODUCE sulforaphane all by yourself!
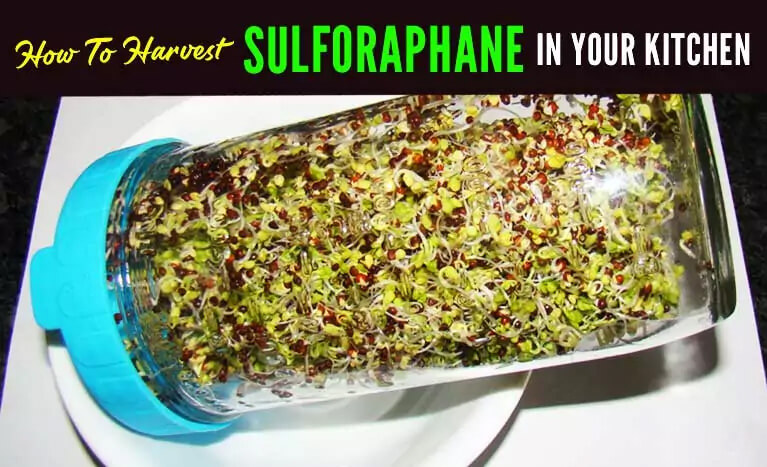
To generate sulforaphane, just get some broccoli seeds and add water: make the seeds sprout. It takes 3 to 4 days to grow all you need for a week. These sprouts are great on salads or sandwiches, and you don’t need a lot for a healthy dose of sulforaphane since broccoli sprouts have a high concentration of sulforaphane. It can be a fun journey to get started with broccoli sprouts. First you need to get some jars, the standard Mason Jars work great—you know, those jars you see in every second-hand store everywhere in the world—that is until you go out looking for them, and no second hand stores seem to have any Mason Jars at all. It’s fun looking though.

After visiting about 5 second hand stores, I went to Amazon and purchased wide-mouth Mason Jars and after sprouting several sulforaphane “crops” in my kitchen, I bought these special lids. These sprouting lids make it easy to add and drain the water. There is a triangular shaped section on these lids and you will thank me if you ever have to struggle with other type lids before you buy these (I don’t know if that triangle thing is patented but it sure works better).

After 3 or 4 days, your jars will be bursting with sprouts if you rinse the seeds twice a day, morning and evening. I purchase organic broccoli seeds and my non-organic (less expensive but probably just as good) broccoli seeds and both make great sulforaphane.
To get the broccoli sprouts started, fill several jars with half water and 3 tablespoons of broccoli seeds in each. Put them in a dark cupboard overnight, and in the morning drain the water and rinse the seeds once with new water. Then hold the bottle sideways and spin it so the seeds stick to the sides all around. Put each jar in a soup bowl, lid first and tipped so any remain water drains into the bowl. I set each of these back in the cupboard and repeat this rinse in the evening and morning for 2 days until the sprouts almost fill the jars. Then I set the jars on the counter for a day, rinsing in the morning and evening, and the final day I put them near the window or in direct sunlight to get all the green color bursting into the kitchen. But you don’t even need to do that because yellow sprouts are also full of sulforaphane. But seeing them turn green in the sun is so cool!
I then dump them on a paper towel and jiggle them around a bit to drain off any extra moisture before putting them in freezer bags. Each bag lasts a few days and extra bags go in the freezer. Surprisingly, if broccoli sprouts are frozen, it INCREASES their sulforaphane content so they have even more power to make you healthy!