Gardening has long been celebrated as a therapeutic and rewarding pastime. There's a unique joy in cultivating your garden, watching plants thrive, and enjoying the fruits of your labor. I love gardening on my homestead, and I even started gardening before I had acres of land. I am confident that you don’t need a large backyard (or even a backyard at all) to start to gardening. Some communities will offer community gardens as an option for people to come together and garden.
While seasoned gardeners have honed their skills over years, beginners may feel daunted by the prospect of nurturing a garden from scratch. I know I did when I first started! If you are wondering about how to start seed-starting, this is for you.
Experience the unparalleled joy of nurturing your own garden, whether it's a balcony with a few pots or a spacious backyard. To assist you in this journey, I'm providing a complimentary seed starter & planting chart, complete with a curated selection of seeds perfect for the upcoming season.

FREE Seed Starting & Planting Chart
Find the joy of cultivating your own garden, whether it's a few pots on a balcony or a dedicated backyard space.
Why Start from Seeds?
Before delving into the practical aspects of seed starting, let's explore why it's an exceptional choice:
- Diversify Your Garden: Starting from seeds opens up a world of possibilities, allowing you to grow an extensive array of plant species and cultivars that might not be readily available as mature plants. Have you ever picked up a seed catalog? There are thousands of options and varieties! If you rely solely on what the local greenhouse as to offer, you will be limited in your options. You can grow black tomatoes if you wanted!
- Cost Savings: Seeds are budget-friendly compared to purchasing mature plants. For the price of a single potted plant, you can obtain multiple seed packets, creating a more expansive and diverse garden. To get a pea plant from my local green house, it was about $4 per plant. A seed packet that had about 25 seeds cost me $3. Those 25 seeds turned into roughly 20 plants. As you can see, seeds save you dearly.
- Control and Customization: Seed starting grants you complete control over your garden's composition. From heirloom tomatoes to exotic flowers, you can tailor your garden to your specific preferences and needs. Again, you do not have as much control over your garden if you are relying on local nurseries. You will only get the varieties that their manufacturers send them.
- Learning Experience: Starting from seeds offers a valuable learning experience. You'll gain insights into the life cycle of plants, from germination to maturity, and develop essential gardening skills along the way. This is also a wonderful homesteading skill to have under your belt. Starting seeds is also an emergency preparedness skill. If stuff hit the fan, you will know how to grow your own food.

Essential Supplies
To embark on your seed starting journey, it's essential to gather the necessary supplies:
- Seeds of Your Choice: The heart of your garden, select seeds that align with your gardening goals and local climate. One thing I have learned in my years of gardening is that sourcing seeds locally (if possible) is incredibly helpful in the garden. Oftentimes, seeds cultivated locally will be used to your climate and environment and make a suitable mix into your garden. You can choose whatever you would like from a catalog as long as it works for your gardening zone.
- Containers or Trays: Choose containers or trays with adequate drainage to prevent waterlogged soil. Waterlogged soils can cause disease that can kill your seedlings. Proper drainage is necessary and something to keep an eye on.
- Seed-Starting Mix: Invest in a high-quality seed-starting mix or create your own by combining components like peat moss, perlite, and vermiculite. This mix offers the ideal balance of moisture retention and aeration for your seedlings. I learned my lesson not using seed-starting mix on a batch of tomato seedlings and they all eventually keeled over after sprouting.
- Watering Can or Mister: A gentle watering method is crucial for preventing soil disruption and damaging delicate seedlings. You don’t want to drown your seedlings, so be gentle in watering. I like to use water bottle sprayers.
- Labels and Markers: Keep track of your plant varieties by labeling each container or tray with the plant name and the date the seeds were sown. Trust me, as much as you think you will remember what is planted where…you won’t.
- Light Source: Seedlings require ample light to grow successfully. Depending on your location, you can rely on natural sunlight or use artificial grow lights. Grow lights will be crucial, invest in quality grow lights. Another lesson I have learned, so you don’t have to.
- Optional Heating Mat or Thermostat: Maintaining a consistent temperature in the range of 65-75°F (18-24°C) is essential for seed germination. You can use seed heating pads if you are not able to maintain those temperatures.

Choosing the Right Seeds
Selecting seeds may seem overwhelming, with countless options available. Here are some factors to consider when choosing the right seeds for your garden:
- Climate Compatibility: Ensure that the seeds you choose are suitable for your local climate and growing zone. This ensures that your plants have the best chance of thriving. For example, if you live in the northern part of the United States, growing citrus may be a problem. Under certain conditions like indoors with supplementation it can be achievable, but outside would not be possible. Take into consideration each plant.
- Space and Garden Goals: Consider the available space in your garden and your specific gardening goals. Do you want to grow vegetables, fruits, or flowers, or a combination of all of them? This is where you would get into companion planting like marigolds are good for warding off pests on produce. Honestly, don’t let this detour you from starting. Mix and match and see what works for you!
- Seed Packet Information: Seed packets provide valuable information, including planting depth, spacing, and estimated germination times. Read these details carefully to ensure successful seed starting.
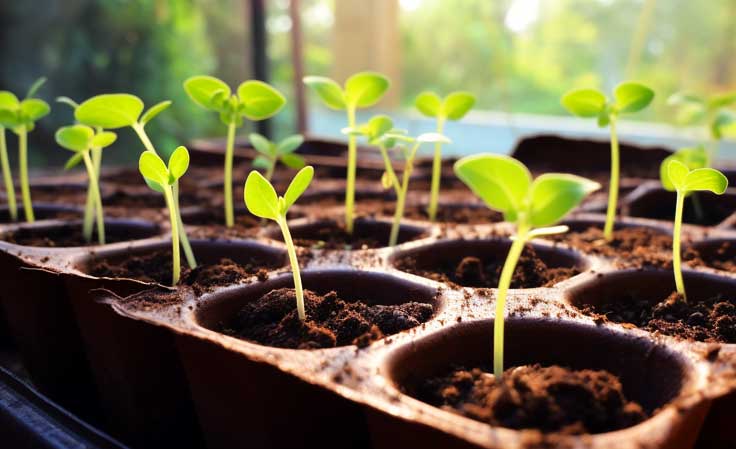
Selecting the Containers
Containers for seed starting vary widely, from traditional seed trays to recycled items like egg cartons or yogurt cups. While the choice of containers is flexible, they should all have one crucial feature: drainage holes. Adequate drainage prevents waterlogged soil, which can lead to root rot. You can DIY seed starting containers out of egg cartons but make sure to punch little holes in the bottom of each for drainage.
Preparing the Potting Mix
The right potting mix is essential for seed starting success. While you can purchase a high-quality seed-starting mix from a garden center, you can also create your own mix by combining the following components:
- Peat Moss: Provides moisture retention.
- Perlite: Enhances aeration.
- Vermiculite: Promotes moisture retention.
Combine these components in equal proportions in a large container to create a mix that offers the ideal balance of moisture and aeration for your seedlings. Ensure that the mix is well-blended to provide consistent conditions for germination.
Sowing the Seeds
Sowing seeds may seem straightforward, but there are essential steps to follow for success:
- Prepare the Containers: Fill your chosen containers or trays with the potting mix, leaving some space at the top to accommodate the seeds.
- Sow the Seeds: Follow the instructions on the seed packets for the correct planting depth and spacing. In general, plant seeds at a depth that is about two to three times the diameter of the seed.
- Label and Date: Label each container or tray with the name of the plant and the date the seeds were sown. This helps you keep track of your plants' progress.
- Watering: Water the soil gently to settle it around the seeds. A mister or a gentle stream of water from a watering can is ideal for avoiding soil disturbance. You don’t want the soil to be water-logged, but just moist.
- Covering Seeds (Optional): Some seeds benefit from being covered with a thin layer of additional potting mix. Check the seed packet for specific instructions.
- Provide Adequate Light: After sowing, place your containers in a location with adequate light. If you're starting seeds indoors, a sunny windowsill or artificial grow lights can provide the necessary light for germination. If you live in a cloudy region like I do, grow lights are a must.
- Maintain Moisture: Keep the soil consistently moist, but avoid overwatering, which can lead to damping-off disease. A plastic cover or plastic wrap can help maintain humidity levels during germination.
- Germination Time: Be patient; germination times vary depending on the plant species. Seed packets typically provide estimated germination times.
Caring for Seedlings
Once your seedlings emerge, it's crucial to provide them with proper care to ensure they develop into healthy plants:
- Light: Seedlings need ample light to prevent them from becoming leggy (long and weak stems). If you're growing them indoors, consider using grow lights to supplement natural light. Ensure the lighting is spaced out. If it is not, you will notice the seedlings reaching for the light. You will want to lower the lights to be just a few inches above the seedlings and adjust them as they grow.
- Temperature: Maintain a consistent temperature in the range of 65-75°F (18-24°C). This ensures optimal growth conditions.
- Watering: Continue to water your seedlings carefully, ensuring that the soil remains consistently moist but not waterlogged. Water from the bottom to prevent disturbing the fragile roots.
- Fertilizing: Avoid over-fertilizing your seedlings. Once they develop their true leaves (different from the initial cotyledon leaves), you can start fertilizing with a diluted, balanced liquid fertilizer. You can also mix in soil from your compost.
- Transplanting: As your seedlings grow, you'll eventually need to transplant them into larger containers or directly into your garden. Be gentle when handling the delicate roots.

Transplanting to the Garden
When the time comes to move your seedlings to the garden, follow these steps to ensure a smooth transition:
- Harden Off: Before transplanting, gradually expose your seedlings to outdoor conditions to acclimate them. Start with short periods outdoors, gradually increasing the duration and intensity of exposure. If you put your seedlings outside without slowly introducing them to the outdoor environment, you will be sad as they will most likely die.
- Select the Right Time: Transplant your seedlings when they are well-established and the risk of frost has passed in your area. The specific timing varies depending on your climate and the plants you're growing. Some plants can handle frost, consult the back of the seed packets.
- Prepare the Garden: Ensure that your garden beds are well-prepared. Clear any weeds, loosen the soil, and add compost or organic matter for nutrient-rich soil. My favorite tool for the garden is a Hori Hori because of how I am able to get in and gut out weeds and loosen soil.
- Spacing: Follow the recommended spacing guidelines for each type of plant. Proper spacing ensures that your plants have enough room to grow and access nutrients.
- Planting Depth: Plant your seedlings at the same depth they were growing in their containers or trays.
- Watering: Water your newly transplanted seedlings thoroughly to settle the soil around the roots and reduce transplant shock.
- Mulch: Applying a layer of mulch around your seedlings helps retain moisture, suppress weeds, and regulate soil temperature. You can use wood chips or straw.
Common Mistakes to Avoid
As you embark on your homesteading seed starting journey, be aware of common mistakes that beginners often make:
- Overwatering: One of the most common mistakes is overwatering, which can lead to damping-off disease and root rot. Allow the soil to dry slightly between waterings. I typically will wait until the top is dry to lightly moist to water again.
- Overcrowding: Planting too many seeds in a single container can lead to overcrowding, which hinders airflow and can cause competition for nutrients. Properly spaced plants can turn into a higher yield.
- Neglecting Hardening Off: Failing to harden off your seedlings can result in transplant shock when they're moved outdoors. Gradually acclimate them to outdoor conditions to prevent this. Don’t skip this step!
- Ignoring Timing: Planting seeds too early or too late for your climate can lead to poor germination or damage from unexpected frost. Be aware of your frost dates by keeping a log or contacting your local nurseries.
- Poor Light Conditions: Inadequate light can cause seedlings to become leggy and weak. Ensure they receive enough light to thrive.
- Inadequate Labeling: Forgetting to label your containers can lead to confusion, especially if you're growing different plant varieties. Label each container clearly. You need to know what you are dealing with as it comes time to transplant to the garden and for the general care.
Troubleshooting
Even with the best care, you may encounter challenges while seed starting. Here are solutions to common seedling problems:
Damping-Off: This fungal disease causes seedlings to wilt and collapse. To prevent damping-off, ensure proper ventilation, avoid overwatering, and use clean containers and soil. Wash containers before using.
Leggy Seedlings: Leggy seedlings have long, weak stems. To prevent this, provide adequate light and maintain proper spacing between seeds.
Slow Germination: Some seeds naturally take longer to germinate. Check the seed packet for estimated germination times and be patient.
Pests: Keep an eye out for pests like aphids, thrips, or spider mites. Use organic pest control methods if needed. This is where companion planting can come into play and rotating your plants every few years to throw the pests off.
Yellowing Leaves: Yellowing leaves can indicate nutrient deficiencies. Consider using a balanced fertilizer to address this issue.
Time to start some seeds
FREE Seed Starting & Planting Chart
Find the joy of cultivating your own garden, whether it's a few pots on a balcony or a dedicated backyard space.
Starting your plants from seeds is an immensely rewarding aspect of gardening and as a self-sufficient homesteader. You are now armed with the knowledge and skills needed to successfully start your gardening journey from scratch. From selecting the right seeds to providing optimal care, seed starting offers you the opportunity to witness the miraculous transformation of tiny seeds into vibrant plants. So, roll up your sleeves, get your hands in the soil, and watch your garden flourish from the very beginning.
FAQs
When is the best time to start seeds indoors?
The timing depends on your climate and the specific plant you're growing. In general, start seeds indoors 6-8 weeks before the last expected frost date in your area.
Can I use regular garden soil for seed starting?
It's not recommended. Seed-starting mix provides the ideal balance of nutrients and aeration for young seedlings.
How often should I water my seedlings?
Water when the soil's surface feels dry, but avoid overwatering, which can lead to root rot.
Do I need grow lights for seedlings?
While natural light is best, grow lights are beneficial, especially in areas with limited sunlight.
What's the most common mistake beginners make when starting seeds?
Overwatering and insufficient light are common mistakes. Ensure proper watering and provide adequate light to avoid leggy seedlings.