Are you craving a sweet and fluffy marshmallow that is naturally sweetened and void of any mystery junk?
Look no further! I am going to show you how easy it is to make your own marshmallows, right in the comfort of your own kitchen.
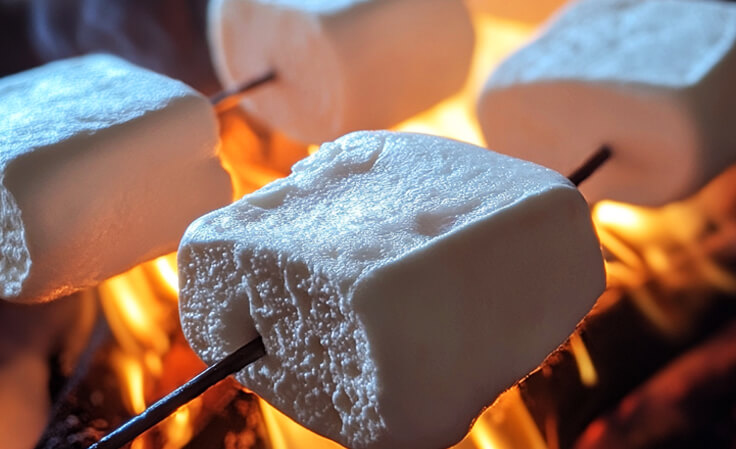
This summer I have been craving smores. How could I not when smores are a summer staple, to me at least. Gathering around a campfire and poking a prong or stick with a marshmallow to toast over the fire—peeling the burnt layers off one by one. YUM! Instead of running to the store to get marshmallows that are filled with corn syrup and blue 1 dye, I make my own!
Why does artificial food coloring even need to be in marshmallows? There is no reason!
These marshmallows are the perfect fluffy mix of earth flavors from maple syrup and that signature marshmallow flavor from the gelatin. Making marshmallows in your own kitcheen not only ensures you get the freshest, most flavorful marshmallows, but it also allows you to control the ingredients. No corn syrup or artificial food colorings for us!
What Are Maple Syrup Marshmallows?
Instead of corn syrup (yuck,) we will use maple syrup as a natural sweetener. Corn syrup is linked to a plethora of health conditions, so I avoid it. It is simple to avoid toxic ingredients when you understand that you can make most things in your kitchen with wholesome ingredients.
The maple syrup not only gives the marshmallows a distinct flavor but also adds a health spin to them, as maple syrup contains antioxidants and minerals. The combination of the light and fluffy texture of marshmallows with the deep and earthy sweetness of maple syrup creates a treat that you will find yourself making again when you run out.
They are perfect for snacking, adding to desserts, or enjoying in hot chocolate during the winter.
Are marshmallows healthy?
They can be! As long as you aren’t filling them with preservative junk or ingredients like this: CORN SYRUP, SUGAR, DEXTROSE, MODIFIED CORNSTARCH, WATER, CONTAINS LESS THAN 2% OF GELATIN, TETRASODIUM PYROPHOSPHATE (WHIPPING AID), NATURAL AND ARTIFICIAL FLAVOR, BLUE 1. These are the ingredients from the most popular brand of marshmallows. You don’t need whipping aids or artificial ingredients to make tasty marshmallows.
Homemade marshmallows are made with gelatin, which is derived from beef. Preferably, try to find a high quality gelatin that is from grass-fed/pasture-raised animals. What an animal eats absolutely affects the nutrient-density of its product. Gelatin is rich in proline and glycine, two essential amino acids, which can help improve gut health by assisting in regenerating the lining of the gut and reducing inflammation.
Homemade Maple Syrup Marshmallows
Ingredients
Ingredients
- 1 cup cold water
- 3 tbsp unflavored gelatin
- 2 cups pure maple syrup
- 1/4 tsp salt
- 1 tsp vanilla extract
- 1/2 cup powdered sugar (for dusting)
Instructions
- Preparing the Pan: Line a 9x13 pan with parchment paper or a silicone liner for easy removal after the marshmallows have properly set.Dust the pan generously with powdered sugar to coat the bottom and sides. Set aside any excess powdered sugar for later. The powdered sugar helps make it so it doesn’t stick as easy and gives the marshmallows a tasty coating.
Blooming the Gelatin
- Pour 1/2 cup of cold water in a mixing bowl.
- Sprinkle the gelatin over the water and let it sit for about 10 minutes to bloom.
Heating the Maple Syrup
- In a medium saucepan, combine the remaining 1/2 cup of water, maple syrup, and salt.
- Heat the mixture over medium heat, whisking until it reaches 210°F. If the mixture starts to boil over, reduce the heat slightly and stir gently to keep it under control.
- Once it reaches 210°F, remove it from heat.
Combining and Whipping
- With a mixer on low speed, slowly pour the hot syrup into the gelatin mixture. Be careful as the mixture will be very hot. This took me about a minute and a half because I would pour a little, let it mix, then pour again.
- Gradually increase the speed to high and continue to whip for 10-15 minutes, until the mixture is thick, glossy, double in size, and has cooled to room temperature.
- Add the vanilla extract in the last minute of whipping, if using.
- Pouring into Molds
- Pour the whipped mixture into the greased pan or silicone molds. Spread it evenly with a rubber spatula to ensure a smooth surface. The mixture will be sticky, so work quickly and efficiently. The longer it sits, the more it is able to setup.
- Sprinkle the top with powdered sugar.
Allowing to Set
- Let the marshmallow mixture sit at room temperature for at least 4 hours, overnight, or until it’s fully set. This allows the marshmallows to firm up and hold their shape.
Cutting and Coating
- Removing from Molds: Once set, remove the marshmallow slab from the pan or molds. This is why parchment paper makes this easy—you can lift and set down somewhere else. This makes handling and cutting the marshmallows much easier.
- Cutting into Shapes: Cut the marshmallows into squares or use cookie cutters for fun shapes. Kitchen scissors work well for precise cutting. You can use a sharp kitchen knife and cut straight down as well. The marshmallows shouldn’t be overly sticky that you can’t separate them.
- Coating: Toss the marshmallow pieces in powdered sugar to coat them completely. This prevents will help so they don’t stick together and gives them a professional finish.
Best Storage Practices
Store your homemade marshmallows in an airtight container at room temperature. This keeps them fresh and prevents them from drying out. If you have to stack the cut marshmallows in a container, put a piece of parchment paper between the layers.
Shelf Life
They should last for about 2-3 weeks, though they’re usually too delicious to last that long! If you want to keep them longer, you can freeze them in an airtight container or a freezer-safe bag.
Serving Suggestions
Pairing with Hot Beverages
Maple syrup marshmallows are perfect for putting in your hot cocoa or coffee. The warmth of the drink will slowly melt the marshmallow releasing the sweet flavor into your drink. Marshmallows are the best part of hot cocoa!
Desserts
Use them in s’mores, on top of sweet potato casseroles, or as a fun addition to desserts like brownies or cakes. They will have a unique homemade flavor that will elevate any dessert that you would normally put marshmallows in!
Health Benefits and Considerations
Natural Sweeteners
Maple syrup is a natural sweetener, which is a better choice than the traditional corn syrup marshmallow. It contains antioxidants and minerals such as zinc and manganese, which can be beneficial for your health.
Troubleshooting Common Issues
Sticky Marshmallows
If you find that your marshmallows are too sticky, ensure they are well coated in powdered sugar. This will help to absorb any excess moisture and prevent sticking.
Not Setting Properly
Make sure you reach the right temperature when cooking the syrup and allow enough time for the marshmallows to set. If they’re still not setting properly, try adjusting the amount of gelatin by increasing another tablespoon the next time around, so 4 tablespoons total.
Variations and Customizations
Flavored Variations
Experiment with different extracts like peppermint, almond, or orange for unique flavors. It is fun to do different flavors for the holidays or to make a treat basket that has a variety.
Frequently Asked Questions (FAQs)
Can I use other sweeteners instead of maple syrup?
Yes, you can use honey or agave syrup, but the flavor will be different. Experiment to find the taste you prefer.
How long do homemade marshmallows last?
They typically last 2-3 weeks when stored properly in an airtight container at room temperature.
Can I freeze homemade marshmallows?
Yes, you can freeze them for up to 3 months. Thaw them at room temperature before serving for the best texture.
Why are my marshmallows not fluffy?
Ensure you whip the mixture long enough and at high speed to incorporate enough air. The marshmallows should double in size and become light and airy.
Are there any low-sugar alternatives for making marshmallows?
You can experiment with low-sugar syrups or natural sweeteners, but it may affect the texture. Consider using stevia or monk fruit sweeteners for a lower sugar option.
Making homemade marshmallows will be the best decision you make this summer or for the holidays! They are a tasty treat and can be whipped up rather quickly. Bake, set, and forget! Not only that, these marshmallows can be a healthy snack for kiddos who have a sweet tooth. No artificial ingredients and packed with grass-fed gelatin instead!